From Concept to Creation: A Comprehensive Guide on How to Make a STEM Toy Plan
Introduction
STEM education—spanning Science, Technology, Engineering, and Mathematics—has become a cornerstone of modern learning. Hands-on toys that engage children in these disciplines are not only fun but also cultivate critical thinking, problem-solving, and creativity. However, designing a successful STEM toy is far from trivial. It requires a systematic plan that balances educational rigor with playfulness, safety with innovation, and cost with accessibility. This article presents a detailed, step-by-step framework on how to make a STEM toy plan—from identifying learning objectives to prototyping and refining the final product. Whether you are an educator, a parent, a hobbyist, or an aspiring entrepreneur, this guide will equip you with the tools to create a toy that genuinely inspires young minds.
—
1. Clarify Your Educational Goals and Target Age Group
The foundation of any effective STEM toy plan is a clear understanding of what you want children to learn and who will use the toy. Without this, your design risks being either too simplistic or overly complex.
1.1 Define the Specific STEM Concepts
Start by asking: Which branch of STEM does your toy primarily address? For example, a toy that teaches basic circuitry falls under technology and engineering; a build-your-own-robot kit combines all four disciplines. Write down the exact concepts—such as gravity, programming logic, gear ratios, or probability—that the toy will illustrate. Be realistic. A single toy cannot cover everything. Focus on one or two deep concepts rather than a shallow overview of many.
1.2 Identify the Target Age and Skill Level
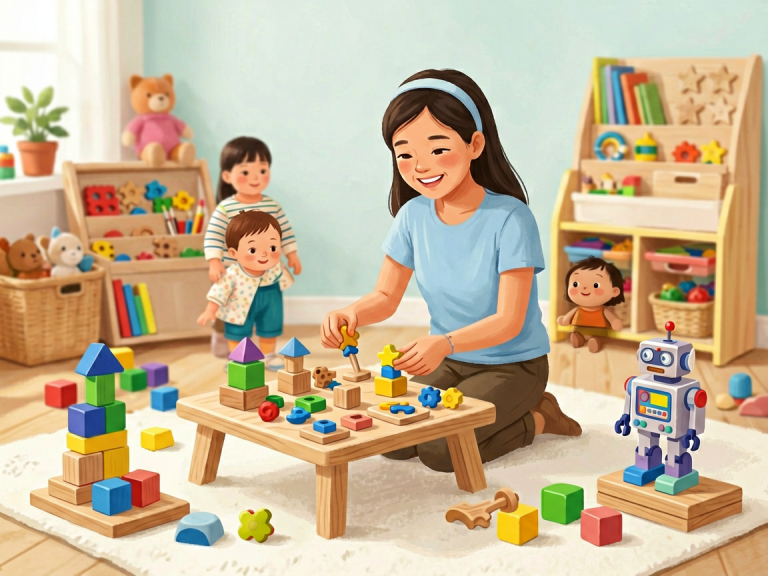
A STEM toy for a 4-year-old must be very different from one designed for a 14-year-old. Consider a typical development milestone: toddlers learn cause and effect through simple mechanical actions; elementary students can handle basic circuits and simple coding; teenagers can grasp abstract math and engineering design. Specify an age range (e.g., 6–9 years) and note any prerequisites (e.g., “must be able to read simple instructions”). This will guide material choices, complexity of assembly, and safety requirements. Additionally, think about inclusiveness—can children with different learning styles or physical abilities engage with the toy? Adapt your plan accordingly.
—
2. Research Existing Toys and Identify Gaps
Before reinventing the wheel, survey the current market of STEM toys. This step is often overlooked but is crucial for originality and relevance.
2.1 Analyze Competitors
Visit toy stores, browse online platforms like Amazon or educational catalogs, and read reviews of popular STEM kits. Note what they do well—for instance, LEGO Boost excels at modular programming, while Snap Circuits introduces electronics clearly. Also note their weaknesses: are the instructions too complicated? Are the materials cheap? Does the toy fail to maintain long-term interest? Create a comparison table for at least five existing products.
2.2 Identify a Unique Value Proposition
Your toy plan should address a gap you identified. Perhaps there is no affordable toy that teaches fluid dynamics to middle-schoolers, or existing coding toys are too screen-dependent. Your unique angle could be low cost, eco-friendly materials, or a focus on collaborative play. Write a one-sentence “unique selling point” (USP) that will anchor your design decisions throughout the process. For example: “A zero-electronics, water-based toy that demonstrates Bernoulli’s principle through hands-on racing.”
—
3. Brainstorm Toy Concepts and Select the Best
With goals and research in hand, it is time to generate ideas. Use structured brainstorming techniques to maximize creativity.
3.1 Use Design Thinking Methods
Organize a brainstorming session (solo or with a team) using methods like mind mapping, SCAMPER (Substitute, Combine, Adapt, Modify, Put to another use, Eliminate, Reverse), or the “Crazy 8” technique (sketch eight different toy ideas in eight minutes). Do not censor any idea initially—even unrealistic ones can spark a practical variant. For each idea, jot down the core interaction: what does the child do? Pull a lever? Assemble a structure? Program a sequence? Predict an outcome?
3.2 Evaluate and Downselect
After generating 10–20 concepts, evaluate them against three criteria: educational value, feasibility (budget, materials, safety regulations), and fun factor. You may use a simple scoring matrix. Eliminate ideas that are too expensive to produce as a prototype, too dangerous for children, or too boring to sustain play. Choose the top two or three concepts and then pick the one that best aligns with your USP and target age. Document your reasoning so that later you can refer back to why this direction was chosen.
—
4. Develop a Detailed Design Blueprint
Now translate the concept into a concrete plan. This is the heart of your STEM toy plan.
4.1 Specify Materials and Components
List every part of the toy, from the housing to the moving parts. Consider durability, safety (no sharp edges, non-toxic paints), and cost. For a mechanical toy, you might need gears, axles, springs, and wood or plastic frames. For an electronic toy, include microcontrollers, sensors, LEDs, batteries, and wires. Also think about packaging and instructions. Create a bill of materials (BOM) with estimated quantities and prices.
4.2 Sketch the Toy and Its Interaction Flow
Draw a detailed sketch or use CAD software to create a 3D model. Show the toy from multiple angles and label key parts. Then describe the user interaction: step by step, what does a child do from opening the box to playing? For example: “Step 1: Attach the solar panel to the car body. Step 2: Place the car under a light source. Step 3: Observe the car moving as the motor spins. Step 4: Change the angle of the panel to see how speed changes.” This flow will later become the basis for your instruction manual.
4.3 Define Learning Outcomes and Assessment
How will you know the toy is teaching? Design embedded “learning moments.” For instance, include a small challenge: “Try to make the car go faster—what angle of the panel gives the highest speed?” This turns play into an experiment. Also plan a simple way to assess understanding, like a post-play question or a design journal where children record observations. Even a casual conversation can serve as informal assessment. Document these outcomes in your plan so that you can test them later.
—
5. Create a Prototype and Test with Real Users
A plan on paper is only a hypothesis. Prototyping and user testing are where the real learning happens.
5.1 Build a Low-Fidelity Prototype
Use inexpensive materials such as cardboard, tape, string, or 3D-printed parts to construct a rough version. The goal is not beauty but functionality. Test basic movements, electrical connections, and ergonomics. Does a child’s hand fit comfortably? Do parts snap together without excessive force? Record failures and fix them immediately. For a coding toy, you can even use a simple app or an Arduino board to simulate the final behavior.
5.2 Conduct User Testing
Recruit children from your target age group (with parental consent) and observe them playing with the prototype. Take notes on: How long do they stay engaged? Do they need adult help? Do they discover the intended learning concepts on their own? Are there any safety concerns? Ask children open-ended questions like “What was the hardest part?” and “What would you change?” Also interview parents or teachers about clarity of instructions and educational value. Compile a list of issues ranked by severity.
—
6. Iterate and Refine the Plan
Rarely does a first prototype work perfectly. Use test feedback to revise your toy plan.
6.1 Prioritize Changes
Group feedback into three categories: Must-fix (safety, unreachable goals), Should-fix (confusing steps, durability), and Nice-to-have (aesthetics, extra features). Address must-fix items first. For example, if children cannot turn a knob because it is too stiff, redesign the gear ratio or use a softer material. If the concept is too abstract, add a visual analogy or a story context.
6.2 Document Revisions and Repeat
Update your design blueprint, BOM, and instructions. Build a second prototype (mid-fidelity, closer to final materials) and test again. You may need three or four iterations before the toy is ready. Each iteration brings you closer to a product that is both educational and enjoyable. Keep a log of changes—this will be invaluable if you later scale production or write a patent application.
—
7. Prepare Manufacturing, Safety, and Marketing Plans
Once the design is stable, think beyond the prototype.
7.1 Compliance with Safety Standards
STEM toys often contain small parts, batteries, or electronic components. Research safety regulations in your target market (e.g., ASTM F963 in the US, EN 71 in Europe). Ensure materials are non-toxic, sharp edges are eliminated, and battery compartments are child-resistant. Include warnings on the packaging. Write a safety checklist in your plan.
7.2 Costing and Sourcing
Calculate the total cost per unit, including materials, packaging, labor, and distribution. If you plan to sell, determine a retail price that covers costs and leaves a reasonable margin while remaining competitive. Identify reliable suppliers for components. For small-scale production, consider local makerspaces or small manufacturers.
7.3 Marketing and Educational Support
Your plan should include how you will communicate the toy’s STEM value. Write a short description for a product page, highlighting the specific skills learned. Consider creating supplementary materials: a teacher’s guide, extension activities, or video tutorials. These add value and differentiate your toy from generic kits.
—
Conclusion
Making a STEM toy plan is a rigorous but deeply rewarding process. It begins with clear educational goals and market research, proceeds through creative brainstorming and detailed design, and culminates in iterative prototyping and testing. Each step demands attention to both the child’s experience and the practical realities of production. A well-crafted plan not only yields a toy that teaches—it creates a platform for curiosity, experimentation, and joy. As you embark on this journey, remember that the best STEM toys are those that make children ask “What if?” and “Why?” By following this guide, you will have a robust roadmap to turn your idea into a tangible, impactful learning tool. Now, pick up your pen, sketch your first idea, and start planning the next great STEM toy.