Crafting an Educational Toy Plan: A Step-by-Step Guide to Designing Playful Learning Tools
Introduction
In an era where digital screens dominate children’s attention, the value of thoughtfully designed physical learning toys has never been greater. A well-crafted learning toy does more than entertain; it stimulates curiosity, develops fine motor skills, fosters cognitive growth, and encourages social interaction. However, creating such a toy is not a matter of random assembly. It requires a structured plan that integrates educational theory, child development principles, material science, and iterative testing. This article provides a comprehensive, step-by-step guide on how to make a learning toy plan — from defining learning goals to finalizing production details. Whether you are an educator, a parent, a toy designer, or an entrepreneur entering the educational market, this framework will help you transform a good idea into a purposeful, safe, and engaging learning tool.
Step 1: Define Learning Objectives and Target Age Group
Every effective learning toy begins with a clear educational purpose. Before sketching any design or selecting materials, you must answer two fundamental questions: *What should the child learn?* and *Who is the child?*
1.1 Identify Core Skills
Learning toys can target a wide range of developmental areas: language acquisition, numeracy, spatial reasoning, problem-solving, creativity, emotional regulation, or physical dexterity. For instance, a shape-sorting block set primarily teaches shape recognition, hand-eye coordination, and categorization. A storytelling dice game promotes narrative skills and imagination. Write down the specific skills your toy aims to develop. Be realistic — one toy cannot teach everything. Focus on one or two key competencies.
1.2 Specify Age Range
Child development follows predictable stages. A toy suitable for a 2-year-old will be dangerous or frustrating for a 6-month-old, and boring for a 5-year-old. Determine the exact age range (e.g., 18–24 months, 3–4 years, 6–8 years). Research developmental milestones: fine motor control, attention span, language ability, and social behavior. For example, toddlers need large, choke-proof pieces, while older children can handle small components and complex rules. Write a brief “user persona” describing the typical child in your target group: their interests, abilities, and common challenges.
1.3 Formulate Measurable Outcomes
A good plan includes how you will know the toy works. Instead of “the child will learn colors,” state “the child will correctly match six primary colors to corresponding objects in 80% of trials.” This specificity guides your design and later testing phases.
Step 2: Research and Ideation
With objectives clear, explore existing solutions and generate creative concepts. This phase ensures your toy is both original and pedagogically sound.
2.1 Competitive and Literature Review
Search for existing toys that target similar skills. Analyze what they do well and where they fall short. Read academic papers on early childhood education, play-based learning, and toy safety standards (e.g., ASTM F963 or EN 71). Note common pitfalls: overstimulating designs, poor durability, lack of open-ended play, or gender stereotypes. This research prevents reinventing the wheel and identifies gaps in the market.
2.2 Brainstorming and Concept Mapping
Gather a team or work alone to generate at least 10–15 rough ideas. Use mind maps, sketches, or even simple physical mock-ups with paper and tape. For each idea, ask: How does this align with my learning objectives? Is it safe? Can it be made affordably? How long will a child engage with it? Prioritize ideas that are simple, durable, and offer multiple ways to play. For instance, a set of interlocking wooden blocks can teach counting, pattern recognition, and balance — all with one product.
2.3 Select the Most Promising Concept
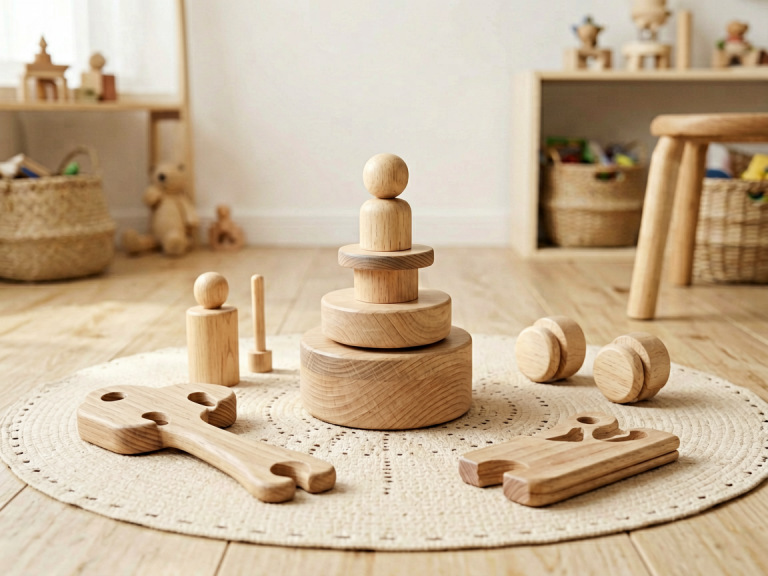
Choose one concept to develop into a full plan. Document why you chose it: the educational value, feasibility, uniqueness, and potential appeal. Create a one-sentence “elevator pitch” that describes both the toy and its learning benefit, e.g., “A modular stacking toy that teaches early math concepts through color-coded numeric rings.”
Step 3: Design Concept and Prototyping
Now turn the idea into a tangible design. This stage involves both creative and technical decisions.
3.1 Sketch and 3D Modeling
Draw detailed sketches from multiple angles, including dimensions. Use software like Tinkercad or Fusion 360 to create a 3D model if you have access. Label every part, its material, and its function. For example, a wooden puzzle might have a base board, six shaped pieces, and a carrying handle. Consider ergonomics: Are the pieces easy for small hands to grip? Are edges rounded? Are colors distinct for colorblind children?
3.2 Create a Low-Fidelity Prototype
Build a rough version using cardboard, clay, foam, or 3D-printed parts. The goal is to test basic interaction. Does the puzzle piece fit? Does the stacking tower wobble? Can a child open the latch without help? Invite a few children (with parental consent) to play with the prototype. Observe their behavior: do they use it as intended? Do they show frustration or delight? Record video or take notes. This low-cost testing reveals major flaws early, saving time and resources.
3.3 Refine the Design
Based on feedback, modify dimensions, shapes, colors, or mechanisms. For instance, if toddlers struggle to grasp a knob, make it larger or change its texture. If a counting game causes confusion, simplify the rules. Iterate the prototype at least two or three times until the core interaction is smooth and intuitive.
Step 4: Material Selection and Safety Considerations
The longevity and safety of a learning toy depend heavily on material choice. This step cannot be rushed.
4.1 Prioritize Safety
For children under three, avoid small parts that can be swallowed. Use non-toxic, BPA-free plastics, water-based paints, and sustainably harvested wood. Test edges for sharpness. Ensure that any batteries are in a secured compartment. Check for choking hazards like loose strings or detachable eyes. Comply with your region’s safety regulations. In the U.S., the Consumer Product Safety Commission (CPSC) provides guidelines; in the EU, the CE marking is required.
4.2 Choose Materials for Durability and Sensory Appeal
Wood offers warmth, durability, and a natural feel. Hard plastics (ABS or polypropylene) are lightweight and washable. Fabrics like felt or cotton are soft for plush toys but require careful stitching. Consider also the environmental impact: biodegradable materials like bamboo or recycled plastics are increasingly popular. For sensory learning, incorporate different textures (smooth, rough, ribbed) and weight variations. For auditory toys, ensure sound elements are not too loud (below 85 decibels for children).
4.3 Estimate Costs and Sourcing
List all materials, their unit costs, and minimum order quantities. Decide whether to manufacture in-house or outsource. For a single prototype, you may 3D-print or handcraft. For mass production, research suppliers on Alibaba, ThomasNet, or through local trade fairs. Include costs for packaging, labeling, and safety testing. A simple cost spreadsheet will help you later determine a retail price that covers expenses while remaining accessible.
Step 5: Production and Assembly
Transition from prototype to final product requires careful planning of manufacturing steps.
5.1 Create a Detailed Workflow
Write a step-by-step assembly guide. For example: (1) Cut wood pieces to size, (2) sand all edges, (3) apply water-based primer, (4) paint with non-toxic colors, (5) assemble using food-grade glue, (6) attach velcro strips, (7) quality inspection. Include quality control checkpoints: check for splinters, color inconsistencies, and loose parts.
5.2 Batch Testing
Produce a small batch (5–10 units) before full production. Test each unit for function and safety. Use a checklist derived from your learning objectives. Also test durability: drop the toy from a height of 1 meter (the “drop test”), wash it if applicable, and let a child play with it for an hour. Document any failures.
5.3 Packaging and Instructions
Design packaging that reflects the educational value. Include clear, age-appropriate instructions — perhaps with pictograms for non-readers. Explain the learning goals to parents (e.g., “This puzzle builds hand-eye coordination and shape recognition”). Consider adding a QR code linking to a video or digital extension activities. Ensure packaging materials are recyclable.
Step 6: Testing and Iteration
A learning toy plan is never truly finished after production; it evolves through real-world use.
6.1 Conduct Formal Play Tests
Recruit a diverse group of children (different genders, backgrounds, and skill levels) within your target age range. Observe them playing independently and with peers. Measure engagement time: does the toy hold attention for at least 10 minutes? Assess learning outcomes: can the child demonstrate the targeted skill after three play sessions? Use simple pre- and post-tests if possible.
6.2 Gather Parent and Educator Feedback
Distribute prototypes to parents or teachers and ask them to complete a structured survey. Questions might include: “How easy was it to clean?” “Did the child request to play with it again?” “Were any parts confusing?” “Do you see improvement in the child’s skill?” Pay special attention to negative comments — they often point to design flaws.
6.3 Iterate Based on Data
Compile feedback and identify the top three issues. For each issue, propose a solution. For example, if children lose interest after five minutes, add a variation or a challenge level. If parents report parts breaking, reinforce the joints or switch to stronger material. Repeat the testing loop until at least 90% of users give positive responses in key areas.
Step 7: Documentation and Final Plan
Every successful learning toy plan ends with thorough documentation that serves as a blueprint for production, marketing, and future improvements.
7.1 Compile the Full Design Document
Create a PDF or printed binder containing:
- Learning objectives and target age group
- Sketches and 3D renders with dimensions
- Materials list with sources and costs
- Safety compliance certificates
- Step-by-step assembly instructions
- Testing results and iterations
- Packaging design and user manual
- Production timeline and budget
7.2 Create a Marketing Summary
Briefly explain the toy’s unique educational value in parent-friendly language. Highlight test results (e.g., “90% of children improved sorting skills after one week”). Include photos of children using the toy. This summary can be used for crowdfunding, retail pitches, or online listings.
7.3 Plan for Long-Term Iteration
No toy remains perfect forever. Schedule a six-month review to analyze customer reviews, safety incidents, and sales data. Plan for version 2.0 that addresses feedback and updates learning content. A living document ensures your toy stays relevant and effective.
Conclusion
Designing a learning toy is a rewarding blend of creativity, pedagogy, and engineering. By following a structured plan — from defining clear learning objectives and researching the field, through iterative prototyping and rigorous testing, to final documentation — you can create a toy that not only delights children but genuinely supports their development. The process demands patience, empathy, and a willingness to fail early and improve constantly. But the outcome — a child’s smile as they discover a new skill through play — makes every step worthwhile. Start your learning toy plan today, and contribute to a world where play and education are inseparable.