Introduction: The Magic of Toy Rotation
How to Start a Toy Rotation System: A Step-by-Step Guide to Decluttering Your Child’s Playroom and Boosting Their Creativity
Every parent knows the scenario: a birthday or holiday arrives, and suddenly your living room is buried under an avalanche of plastic, plush, and battery-operated chaos. The child, overwhelmed by abundance, flits from one toy to the next, engaging with none for more than a few seconds. The playroom, once a source of joy, becomes a battlefield of clutter, tantrums, and lost pieces. If this sounds familiar, you are not alone—and the solution is simpler than you might think.
A toy rotation system is a strategic method of organizing your child’s toys into a limited set that is accessible at any given time, while the rest are stored away and swapped out periodically. This approach is not just about tidiness; it is a powerful tool for child development, reducing overstimulation, and reclaiming your sanity. In this comprehensive guide, you will learn exactly how to start a toy rotation system from scratch—whether you have a newborn, a toddler, or a school-aged child. By the end, you will have a clear, actionable plan to transform your home and your child’s play habits.
Why Bother? The Science and Sanity Behind Toy Rotation
Before diving into the “how,” it is essential to understand the “why.” Many parents resist toy rotation because it seems like extra work. However, the benefits far outweigh the initial effort.
Reduces Overstimulation and Improves Focus
According to child development experts, an abundance of choices can lead to decision fatigue and shallow play. When a child is surrounded by dozens of toys, their brain is constantly scanning for the next exciting object, preventing deep immersion in any single activity. A study published in the journal *Infant Behavior and Development* found that toddlers with fewer toys played more creatively and for longer periods. Rotation limits visual clutter, allowing your child to truly engage with what is in front of them.
Encourages Creativity and Problem-Solving
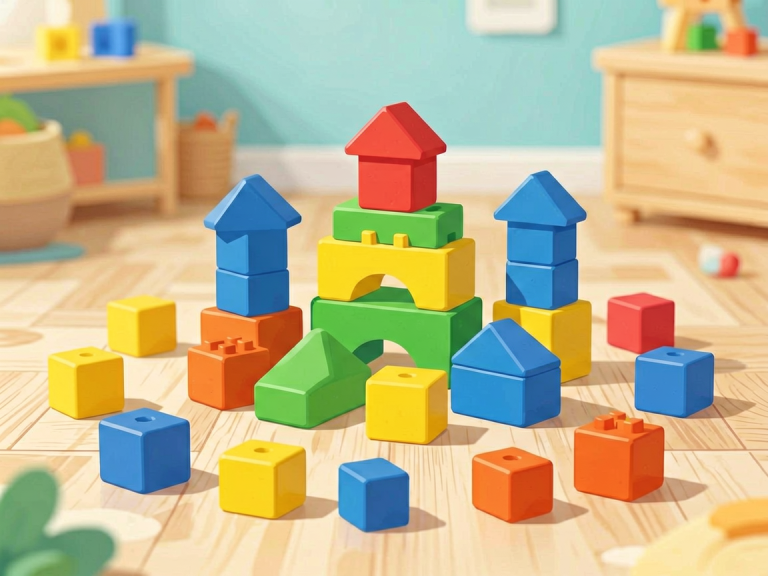
When toys are limited, children are forced to use their imagination. A set of wooden blocks becomes a castle, a car, or a bridge—not just one more item in a pile of pre-designed playsets. Rotation introduces novelty without the expense of new purchases. Each time a stored toy reappears, it feels fresh and exciting, reigniting interest and inspiring new ways of playing.
Simplifies Clean-Up and Teaches Responsibility
With fewer toys out, clean-up becomes a manageable five-minute task instead of an hour-long meltdown. Children can more easily see where everything belongs, and they learn to take care of their limited collection. The rotation system also teaches delayed gratification: they learn that not everything is available all the time, and that waiting can make something more special.
Saves Money and Reduces Waste
You will find that you buy fewer toys once you realize that a small, thoughtfully chosen set provides more sustained fun than a mountain of cheap plastic. Rotating also extends the life of toys—they remain “new” because they are not worn out from constant exposure.
Step 1: Audit and Sort Your Toy Collection
Before you can rotate, you must know what you have. This step is often the most daunting, but it is also the most liberating.
Gather Every Toy in One Place
Pull out every toy from every corner of your home—bedrooms, living room, car, diaper bag, grandparents’ house. Yes, everything. Throw it all into a big pile on the floor or spread it across a large table. You will be shocked at the sheer volume. But do not panic; this is the moment of truth.
Categorize and Purge
Sort the toys into broad categories: building toys (blocks, Legos), pretend play (kitchen sets, dolls), puzzles and games, art supplies, vehicles, musical toys, books, and anything else. As you sort, be ruthless. Get rid of:
- Broken or missing-piece toys
- Toys your child has outgrown (baby rattles for a 5-year-old)
- Toys that have never been played with (the ones that seemed like a good idea but collected dust)
- Duplicates (you do not need three identical plastic dinosaurs)
Donate, sell, or recycle these items. If you cannot bear to part with sentimental toys, store them in a separate “keep forever” bin that is not part of the rotation.
Quantify What Remains
Count how many toys you have in each category. This number will help you decide how many to put into each rotation basket. A good rule of thumb: for a toddler, 8–12 toys total is plenty; for a preschooler, 10–15; for an older child, 15–20 including books and puzzles.
Step 2: Choose Your Storage System
Toy rotation lives or dies by its storage. You need a system that is easy to access, easy to swap, and visually appealing.
The Golden Rule: Out of Sight, Out of Mind
The toys that are not currently in use must be completely inaccessible to your child. If they can see the storage bins, they will demand access. Use opaque bins, a closet with a door, a garage shelf, or under-bed boxes. Label them clearly (by category or by rotation number) so you can find them quickly.
Invest in Clear or Labeled Bins
For the active rotation set, you can use open shelves or a low basket that your child can reach freely. But for the stored toys, use sturdy plastic bins with lids. Stackable bins save space. I recommend using one bin per rotation, and labeling it with a number or theme (e.g., “Rotation 1 – Fine Motor” or “Rotation 2 – Pretend Play”).
Consider a “Outgoing” Bin
Place a small bin or basket near the main play area. When your child finishes playing with a toy, they put it in the outgoing bin instead of back on the shelf. This helps you track which toys are actually being used, and makes swapping easier—you simply return the outgoing toys to storage and bring out the new ones.
Step 3: Create Your Rotation Sets
Now comes the creative part: assembling groups of toys that will cycle in and out.
Balance the Types of Play
Each rotation should include a variety of play types to support holistic development. Aim for:
- Imaginative play: dolls, action figures, play food, costumes
- Construction: blocks, Duplo, magnetic tiles
- Fine motor: puzzles, lacing beads, shape sorters
- Gross motor: balls, tunnels, ride-on toys (if space allows)
- Sensory: playdough, water toys, sand tools
- Literacy/quiet play: books, flashcards, sticker books
Avoid putting too many of the same type in one rotation. For example, do not include three puzzles and only one vehicle; mix it up.
Consider Your Child’s Current Interests
If your child is obsessed with dinosaurs, put dinosaur toys in the current rotation. In the next rotation, swap them out for farm animals. The novelty of seeing them again in a few weeks will be thrilling.
Number Your Rotations
Create 3–5 rotation sets, depending on how much space you have and how frequently you want to swap. For most families, 3–4 rotations is ideal. Label each bin with a number or a simple theme (e.g., “Red Bin,” “Blue Bin,” “Green Bin”). The number of bins should be one less (or one more) than the number of rotations—one bin is always out.
A Sample Rotation Schedule
- Rotation A (current): wooden blocks, a puzzle, two cars, play kitchen utensils, a doll, and three books.
- Rotation B (stored): magnetic tiles, a shape sorter, two trucks, dress-up cape, animal figurines, two books.
- Rotation C (stored): train set, lacing beads, bubble wand (for outdoor), play food set, three books.
- Rotation D (stored): marble run, stacking cups, large ball, finger puppets, two books.
Step 4: Implement the Rotation Schedule
You have your bins ready. Now you need a rhythm that fits your life.
Start with a Clean Slate
Put out only the toys from one rotation bin. Store all others away. Yes, all of them. This might feel extreme, especially if you have older children who are attached to certain items. Explain the system to them: “We are going to play with these toys for a while. When we swap, you will see your favorite toy again later, and it will feel like new.”
Choose a Swap Frequency
How often should you rotate? This depends on your child’s age and attention span. For babies under 18 months, swap every 2–3 days because they develop so rapidly. For toddlers (18 months to 3 years), swap weekly. For preschoolers (3–5 years), every 1–2 weeks. For school-aged children, every 2–4 weeks is fine, especially if they are involved in longer, more complex play.
Pro tip: Pick a regular day for swapping—Sunday evening works well for many families. Set a timer for 20 minutes and perform the swap as a family ritual.
Involve Your Child
For older toddlers and up, make the swap a game. Let your child help you carry the bins, choose which toy goes into the outgoing bin, and anticipate what is coming next. This builds excitement and ownership.
Step 5: Troubleshoot Common Challenges
Even the best-laid plans hit snags. Here are solutions to the most frequent problems.
“But I Want That Toy NOW!”
This is the most common objection. Your child will see the storage closet and demand a toy from a previous rotation. You have two options:
- Stick to your guns: Remind them that the toy will come back in the next rotation. This teaches patience and delayed gratification. Offer to play with a current toy together.
- Have a “wish list” basket: Let your child put a picture or note of the desired toy into a basket. When you swap, try to include it. This acknowledges their feelings without giving in immediately.
My Child Only Plays with One Thing
If your child exclusively plays with, say, trains, do not worry. The rotation still works—just ensure each rotation includes at least one train set. The other toys will be explored eventually, especially when the train gets boring. If they ignore everything else, try playing with those toys yourself to model engagement.
The System Feels Too Rigid
Adapt it. Maybe you need a “floating” bin of favorite toys that never rotates (like a beloved stuffed animal or a favorite book). That is fine. The goal is not perfection but reduction of overload. If the system causes stress, simplify.
Storage Space is Limited
You do not need a spare closet. Use under-bed storage, decorative trunks at the end of the bed, or stackable bins in a corner. Even a large suitcase works. If you live in a tiny apartment, consider rotating with a friend—swap bins with a neighbor every few weeks.
Step 6: Maintain and Evolve the System
Toy rotation is not a one-time event; it is a lifestyle. Over time, you will refine it.
Regularly Cull
Every three months, do a mini-audit. Remove toys that are no longer age-appropriate or have lost their appeal. Add new ones from birthdays or holidays. Rotate out seasonal toys (water toys in summer, puzzles in winter).
Watch for Overload
If you notice that your child is overwhelmed even with the rotation set, reduce the number of toys in each bin. Conversely, if they seem bored, add a few more or swap more frequently.
Celebrate the System
By implementing toy rotation, you are giving your child the gift of focused play, creativity, and a clutter-free environment. You are also teaching them that less is more—a lesson that will serve them well throughout life.
Conclusion: The Joy of Less
Starting a toy rotation system is one of the most transformative changes you can make in your home. It requires an initial investment of time—a weekend of sorting, purging, and organizing—but the payoff is immense: a calmer home, a more creative child, and a parent who no longer trips over a pile of plastic dinosaurs every time they walk through the living room.
Remember: you are not depriving your child; you are curating their environment for optimal growth. The toys they do have will be treasured, not taken for granted. The rotation will become second nature, as automatic as brushing your teeth. And one day, you will look around your tidy playroom, hear your child deeply absorbed in a game with a single set of blocks, and smile. You have succeeded.
So go ahead—gather those bins, sort that mess, and start your toy rotation today. Your child (and your sanity) will thank you.
—
*Word count: 1,422 words*